서버 설치 - 클라우드 이미지 - Digital Ocean
개요
Sandfly는 단일 사전 구축 이미지로 Digital Ocean에서 빠르게 배포할 수 있습니다. 이러한 방식으로 배포된 이미지는 대부분의 구성 옵션이 자동화되어 있어 빠르게 시작할 수 있습니다.
기본 클라우드 설치의 경우 서버와 노드가 동일한 시스템에 위치합니다. 이는 서버와 노드를 별도의 가상 머신(VM)에서 실행하는 것을 선호하므로 Sandfly에 대한 최적의 보안 구성은 아닙니다. 그러나 소규모 프로덕션 사용 및 테스트에는 충분할 수 있으며 적은 오버헤드로 제품을 빠르게 배포할 수 있습니다.
Sandfly 서버는 사용자 인터페이스(UI), REST API 및 데이터베이스를 호스트합니다. Sandfly가 작동하려면 서버 인스턴스가 항상 설치되어 실행되고 있어야 합니다. 마찬가지로 시스템은 손상 및 침입자를 스캔하는 실제 작업을 수행하는 스캔 노드를 시작합니다. 이들도 설치 후 시스템에서 항상 실행되고 있어야 합니다.
클라우드 이미지 요구사항 및 프로비저닝
Sandfly와 함께 사용할 VM을 프로비저닝할 때 최소 8GB의 RAM과 충분한 CPU를 권장합니다. 소규모 배포에서는 이것이 최소값이지만 더 많은 호스트를 추가할수록 상향 조정해야 할 수 있습니다. 새 VM 이미지에는 Sandfly가 사전 설치되어 있어 구성할 준비가 되어 있습니다.
구성을 시작하기 위해 호스트에 로그인
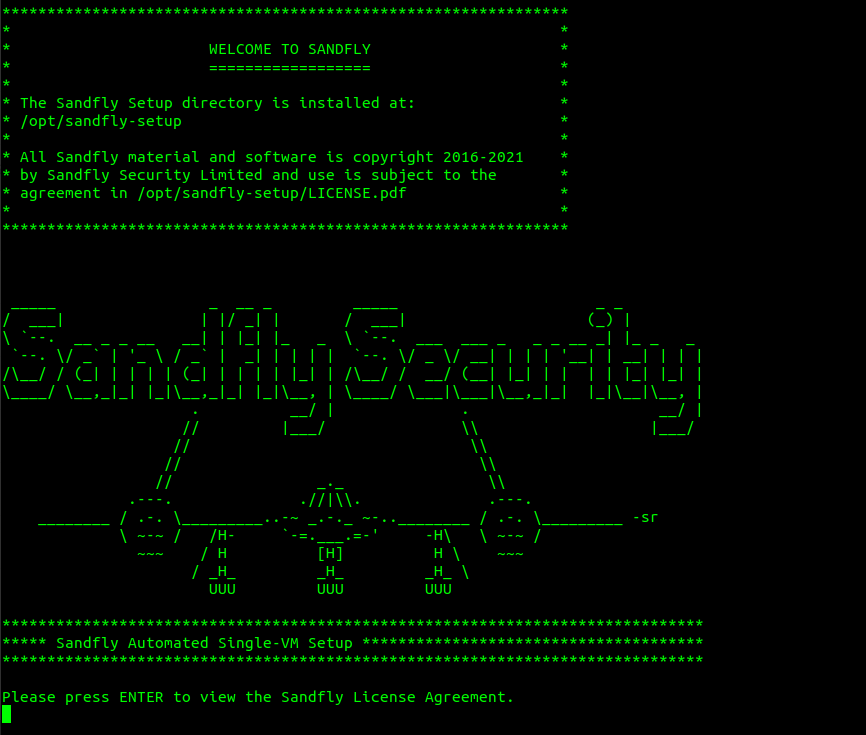
클라우드 VM 인스턴스가 시작되면 SSH 자격 증명을 사용하여 로그인할 수 있습니다. 아래의 설치 화면이 즉시 나타납니다.

Welcome to Sandfly Install
라이선스 약관 동의
Sandfly의 라이선스 약관을 검토하고 동의하도록 요청받습니다. 약관을 읽은 후 YES를 입력하십시오.
서버 자동 설정 및 암호화 키 생성
라이선스에 동의한 후 시스템이 데이터베이스와 암호화 키를 초기화합니다. 이는 모두 자동화되어 있지만 시스템 속도와 키 생성 알고리즘에 따라 완료하는 데 1-2분 정도 걸릴 수 있습니다.
이 시간 동안 Sandfly를 즉시 사용할 수 있도록 자동 평가판 라이선스가 생성됩니다. 유료 라이선스가 있는 경우 로그인한 후 평가판 라이선스를 삭제하고 교체할 수 있습니다.
최소 구성 완료
설정이 완료되면 아래와 같은 메시지를 보게 됩니다.
******************************************************************************
**                                                                          **
** SANDFLY INSTALLATION COMPLETE                                            **
**                                                                          **
** Use the URL and login information printed below to log in to your        **
** server. The initial admin password is stored on this server in           **
** the setup_data directory; we recommend you change your initial           **
** password after logging in.                                               **
**                                                                          **
******************************************************************************

===> URL: https://192.168.1.10/
===> Username: admin
===> Password: system-treason-decibel-scouring-coasting-padding-active
비밀번호를 기록해 두십시오. 비밀번호는 무작위로 생성되며 시스템에 처음 로그인하고 설정할 때 필요합니다.
선택사항 SSL 서명된 인증서
이 설치 스크립트는 스캔 노드와 서버에서 사용할 자체 서명된 SSL 키를 생성합니다. 서명된 인증서를 사용하려는 경우 Sandfly는 EFF Let's Encrypt 서명 서비스를 사용하여 인증서를 생성할 수 있습니다.
서명된 인증서 요구사항
EFF Let's Encrypt 서비스를 사용하겠습니다. 이 서비스에는 다음이 필요합니다:
- 유효한 DNS 해상 가능한 호스트명.
- 인터넷에서 보이는 TCP 포트 80.
서비스에는 인증서에 사용되므로 해상되는 호스트명이 있어야 합니다. 또한 서비스가 살아있는지 확인하기 위해 포트 80에서 서버에 연결합니다. 이 프로세스가 완료되면 포트 80을 차단하고 Sandfly 서버에 대해 더 엄격한 방화벽 규칙을 설정할 수 있습니다.
중요: 서명 중에는 포트 80이 인터넷에서 보여야 합니다!사용 중인 서버가 인터넷에서 도달 가능하고 올바르게 해상되는 정당한 호스트명을 가지고 있는지 확인하십시오. EFF 서버가 호스트를 검증하려면 포트 80이 열려 있어야 합니다.
Let's Encrypt에서 인증서를 받은 후에는 이 포트를 다시 차단할 수 있지만 생성 과정 중에는 열려 있어야 합니다.
SSL 설정 실행
시작하려면 setup-ssl 스크립트를 실행하십시오.
Ready for a real SSL certificate? Add a record for this host to
your public DNS server, make sure port 80 is open from the Internet,
and run `setup-ssl` to request a certificate from Let's Encrypt.
다시 한 번 말하지만, 입력한 호스트명이 정당하고 포트 80이 인터넷에서 도달할 수 있는지 확인하십시오. Let's Encrypt 서비스는 인터넷에서 도달할 수 없는 서버에 대해서는 어떤 인증서도 서명하지 않습니다.
다음 질문들은 아래에서 볼 수 있듯이 자명한 내용입니다.
*************************************************************************
Requesting Certificate from Let's Encrypt

We are now going to try to contact Let's Encrypt with EFF's certbot to
sign our certificate. The Sandfly server must be accessible from the
internet on TCP port 80 for this procedure to work.

This script will temporarily stop the Sandfly server.
*************************************************************************

ACTION REQUIRED: you must add a public DNS entry for this host that
resolves   to the outside internet IP address of this server
(192.168.1.10). Port 80   must be open from the internet for Let's Encrypt
to complete its validation. What is the public DNS entry for this server
(e.g. "sandfly.example.com")?
==> example.sandflysecurity.com
The server will now be stopped so we can obtain a certificate.
Next you will be asked for a contact e-mail. We recommend you put in a valid e-mail in case there is a security alert about the certificates.
Stopping sandfly-server...
sandfly-server
sandfly-server-mgmt
Saving debug log to /var/log/letsencrypt/letsencrypt.log
Plugins selected: Authenticator standalone, Installer None
Enter email address (used for urgent renewal and security notices) (Enter
'c' to cancel): example@sandflysecurity.com
You will need to agree to the EFF terms of service. You can also choose to be on their mailing list or not for updates.
When completed you will see the following:
Obtaining a new certificate
Performing the following challenges:
http-01 challenge for example.sandflysecurity.com
Waiting for verification...
Cleaning up challenges

IMPORTANT NOTES:
 - Congratulations! Your certificate and chain have been saved at:
   /etc/letsencrypt/live/example.sandflysecurity.com/fullchain.pem
   Your key file has been saved at:
   /etc/letsencrypt/live/example.sandflysecurity.com/privkey.pem
   Your cert will expire on 2021-07-05. To obtain a new or tweaked
   version of this certificate in the future, simply run certbot
   again. To non-interactively renew *all* of your certificates, run
   "certbot renew"
 - Your account credentials have been saved in your Certbot
   configuration directory at /etc/letsencrypt. You should make a
   secure backup of this folder now. This configuration directory will
   also contain certificates and private keys obtained by Certbot so
   making regular backups of this folder is ideal.
 - If you like Certbot, please consider supporting our work by:

   Donating to ISRG / Let's Encrypt:   https://letsencrypt.org/donate
   Donating to EFF:                    https://eff.org/donate-le

Copying signed certs to SSL directories
Certificates copied. Done.
sandfly-server-mgmt
server.config.json updated with new SSL certificate.
Re-starting Sandfly Server.
sandfly-server
93c3b912b1096f8c002e403cf3adfd5a292c8ffa6fa1869ff534451d24f92975
Done!
모든 것이 정상이면 UI에 연결할 때 브라우저에서 유효하지 않은 인증서에 대한 경고가 표시되지 않습니다.
Sandfly를 호스팅하기 위해 내부 서버를 사용하는 경우, 이 방법을 사용할 수 없을 것입니다. 서버 인증서에 서명하는 다른 방법을 찾아야 합니다. 자체 서명된 인증서를 사용하고 브라우저에서 수동으로 허용하는 것이 괜찮다면 이 단계를 건너뛰세요.
자체 CA로 서명된 키를 생성할 수 있는 방법이 있다면, 인증서와 키를 base64로 인코딩하여 setup_data 하위에 있는 config.server.json 파일의 필드에 배치해야 합니다:
- server.ssl.server.cert_signed
- server.ssl.server.private_key_signed
설정 완료
이제 서버의 URL에 연결하고 사용자명 admin과 위의 설정에서 무작위로 생성된 비밀번호를 사용하여 로그인할 수 있습니다.
Updated 7 days ago